Create and Test a Prototype
Figma 101
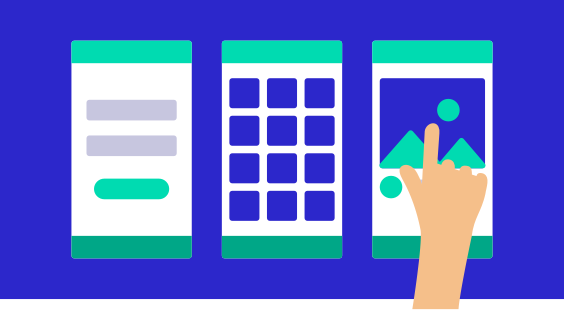
Add connections between the screens and share your prototype.


Learning objectives:
- Learn how to create a prototype in Figma
- Create connections between Frames and Layers
- Present and share your prototype
- Practice switching between Design and Prototyping modes
- Design a slide-out menu to add to your prototype
Time to complete: 30 minutes
Today’s tutorial
1. Access the prototyping options
So far in this course, we’ve worked exclusively in the “Design” tab of the Properties panel (the area on the right of the window). Time to click the “Prototype” tab:

2. Rename the Frames in your app flow
Before creating any prototype, it’s a good idea to make sure your Frames have distinctive names. We’ve given our three screens descriptive titles: “Login Screen,” “Photo Stream,” and “Photo Post.” To rename a Frame, all you need to do is double-click its label at the top-left-hand corner of each Frame, type the new name, and hit Enter. You can also rename Frames in the Layers panel on the left.
Good naming conventions are especially important in larger projects—just imagine trying to build a 50-screen prototype if all of your Frames are named some variation of “iPhone SE - Copy 42”!
3. Set a starting Frame
Prototyping in Figma works by creating links between Frames and elements within Frames. When we present the prototype, the user is then able to click on linked elements to move around the app.
We first need to establish the screen where the user experience (UX) begins. Click on the “Login Screen” Frame you designed in the Layers panel, and you’ll then see the options change in the Prototype tab of the Properties panel on the right. Then click the “+” icon to the right of where it says “Flow starting point” in the Properties panel.
4. Create a connection
If we select Frames or specific elements within our Frames while the Prototype tab is open, we get an extra, circular handle on the right-hand edge of every object. This handle allows us to set which screen that object leads to when it is tapped.

Let’s use this to create a connection. First, select the “Sign In” button in your Login Screen. Then click and hold on that circular handle, and drag an arrow over to the Photo Stream to create a connection. This means that when the user taps the “Sign In” button in our prototype, they will be taken to the “Photo Stream” screen.
Once you’ve successfully made a connection, a small pop-up will appear confirming how the interaction will work. Take a peek at the drop-down options here. If you’ve clicked away already, you can make this pop-up reappear by clicking on the light blue connect arrow that extends from the “Sign In” button to the Photo Stream Frame.
5. Create another connection
Let’s now repeat the process by linking one of the photos in the Photo Stream to the Photo Post Frame. Simply click on the photo of the heron and drag the connection handle over to the Photo Post Frame.
6. Create connections for the “back” button
Repeat this process once more to create a connection from the “Home” icon we created in the nav bar to the Photo Stream page. This is pretty rudimentary functionality, but it will give your users a feel for how they will move around the app.
7. Set up a “Profile” page
We’ve got time today to create one extra screen. This gives us an opportunity to practice moving between the Design and Prototype tabs in the Properties panel and to get a feel for managing our prototype connections while adding to the app design.
Duplicate your Photo Post Frame by selecting that Frame and hitting [[⌘]][[D]] (Mac) or [[Ctrl]][[D]] (PC). Did you notice that when you duplicated the Frame, the connection from the “home” button was also carried across to the new Frame? Any connections that originate from the duplicated Frame will also be copied over. This can save work, but it can also create problems if the connections aren’t updated where necessary.
In this case, we want to keep that one connection we have from the “Home” button to the Photo Stream page. If you want to remove a link between screens, simply click on the connection arrow and hit Delete on your keyboard.
8. Build the “profile page”
It’s time to create a simple Profile page that we’ll eventually connect to the Profile button in the nav bar. Select everything in the duplicate of the Photo Post screen except the wordmark and nav bar, and then delete it. Now, use the skills you’ve gained over the past few days to reproduce the design below.
Notice that several elements are things you’ve already created. They are just resized and edited:
- The profile picture centered at the top comes from the Photo Post screen
- The two buttons are duplicates of the “Sign In” button on the Login Screen
- The three animal pictures are from the Photo Stream
Beyond that, you’ll need text boxes, lines, ellipses, and some columns to help distribute these elements properly. Have a go at this independently, but if you get stuck, check out the sample file linked at the end of today’s tutorial.

9. Create connections to the Profile
The final step is to create connections to the Profile screen:
- The profile icon button on the Photo Stream, linking to the Profile Frame
- The profile icon button on the Photo Post, linking to the Profile Frame
- The home icon in the Profile Frame should already be linked back to the Photo Stream, but it doesn’t hurt to double-check like we did in the video tutorial
10. Test your prototype
You can launch your prototype by hitting the “Present” button at the top-right of the Figma interface. Do this now to check that all your connections are working as planned!
Note that in the latest version of Figma, it’s possible to present your prototype in a device container. While in the “Prototype” tab, select “iPhone SE” from the dropdown in the “Device” section. Then, simply click the “Present” button again! One of the advantages of using a simulation like this is that it gives a more accurate experience of the size and scale of screen elements.
11. Share your prototype
To share your designs as a prototype, copy the link from your browser’s address bar while you’re in “Present” mode, and send it via email or instant message. Get a friend or family member to try using the prototype.
Voilá, you’re doing user testing! Watch them use the prototype. Do they intuitively know where to click? What ideas does watching them give you for how to improve the design?
That’s the end of Day 5! It might feel like we’ve been taking baby steps, but you’ve already learned tons about Figma’s interface, its core set of functions, and the principles of building a prototype. Tomorrow, we’ll consolidate all of those skills by converting this design to a tablet or desktop-sized version.
Today’s bonuses

Create a Tablet or Desktop Version
Unleash your creativity to adapt your design to tablet or desktop size!