


Emma Demers, based in Washington, D.C., has been mentoring at Designlab since December 2020. Currently, she's an Education Design Fellow at an education design firm called TechChange where she's conducting user research and qualitative analysis for digital products. Previously she worked at an experiential product development lab as a UX/UI designer while she was in undergrad at Dartmouth College.
Her favorite part about being a mentor is meeting so many passionate students that challenge the way she approaches design and design thinking. Emma recently completed a year of service with AmeriCorps where she taught elementary school students, and this upcoming school year she'll be completing another year of service, this time as a Community Liaison for a DC public school. Afterwards, she plans on pursuing a career in education design.
If you’ve ever tried being a freelance designer, you probably know how hard it can be to keep your projects organized in one place, especially when working in sprints. The company I previously worked for, Dartmouth’s DALI Lab, routinely used Notion to achieve such organizations and I decided to adopt the platform for my own freelance work.
It wasn’t until I started using Notion for my independent projects that I had finally centralized all of my deadlines, clients, invoices, templates, and design briefs. Whether you’re a seasoned user of Notion (like me) or a beginner with an interest in learning more, I highly recommend trying out this process to easily create design sprints (and much more) in Notion.
The process of creating design sprints (also known as a kind of Agile process) is well known across the design world, and it can be elaborate to do by oneself as a freelance designer. But Notion makes it super easy, and can easily house other aspects of your design process too! Below is a walkthrough of how I set up new client dashboards and design sprints in Notion.
Set up a New Client Dashboard
Setting up a dashboard to house all of your documents, links, and databases is easy to create and customize.

I stick to the same template for all of my dashboards for ease-of-use, and simply duplicate the template and adjust the sections accordingly for every new client or employer. For more on templates, check out this handy article by The Productive Engineer.
You can create extra pages inside your dashboard—I prefer my briefs, interview/user notes, and invoices to live here. These pages are usually a mix of Notion templates and regular data tables or checklists, depending on the page’s purpose. For instance, I prefer my invoices to be a simple name/date table with links to the actual documents, and my briefs are usually formatted pages with text and links.
The possibilities are endless due to the customizable nature of Notion’s modular block tool. To get an idea of what’s possible you can always check out Notion’s giant template gallery (there’s a whole section dedicated to design).
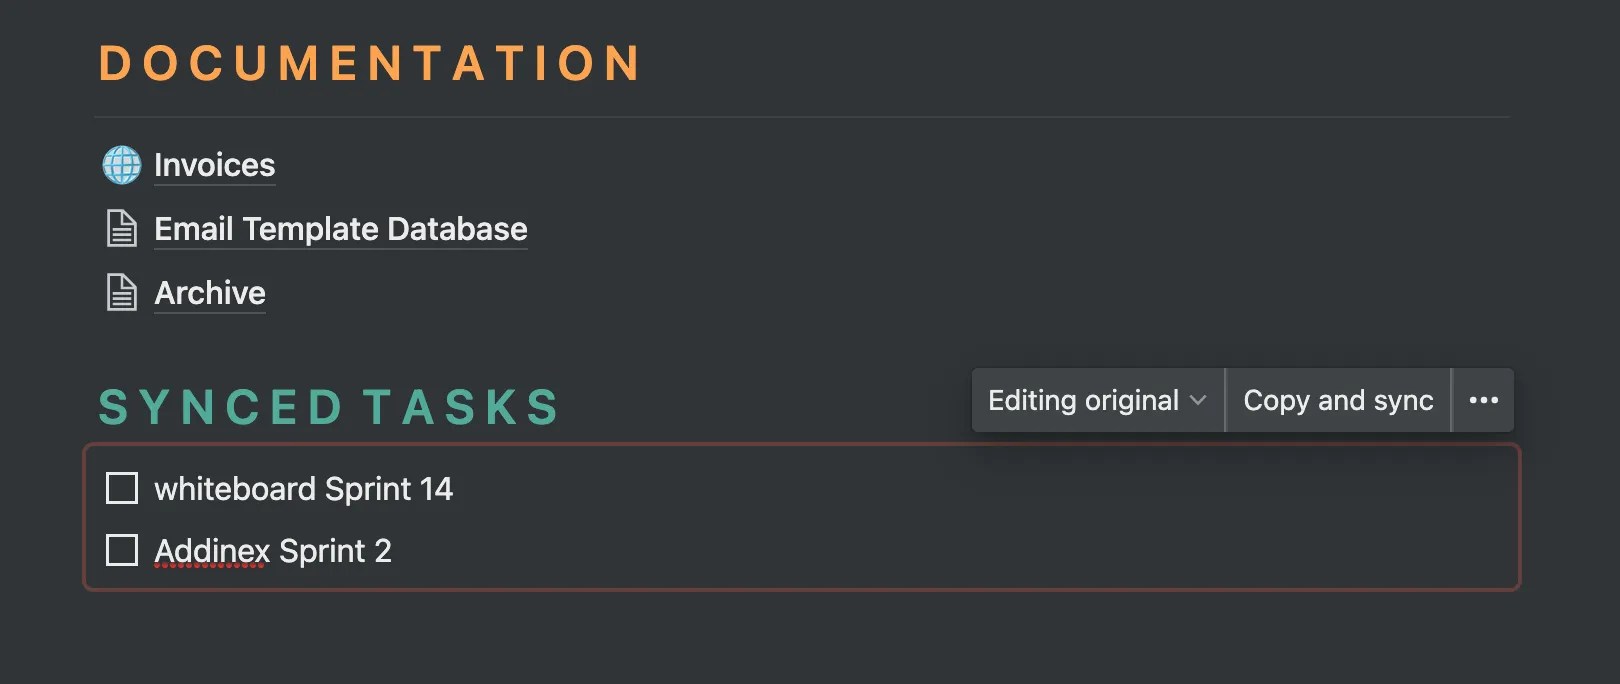
Notion has now also synced blocks, which allow you to accomplish things like create a synced calendar or global task list across all your dashboards. I suspect this would be most helpful for visualizing any overlapping tasks when you’re juggling multiple clients.
Create Your Design Sprint Database
For every dashboard I create, I also create a sprint database, which houses my design tasks (both UX and UI) for a specific client. From the dashboard page, I add a page-within-a-page and use Notion’s Design Roadmap as a template for what will become my sprint database.
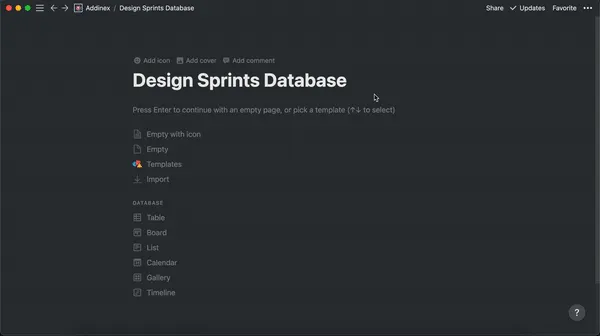
The page automatically populates with a kanban board and many different properties, some of which I end up deleting.
The most useful items for me as a designer are always:
- Type: task versus epic, in my case
- Status: forms the categories for the kanban
- Sprint: numbered consecutively, and mine are always a week long, Monday to Sunday
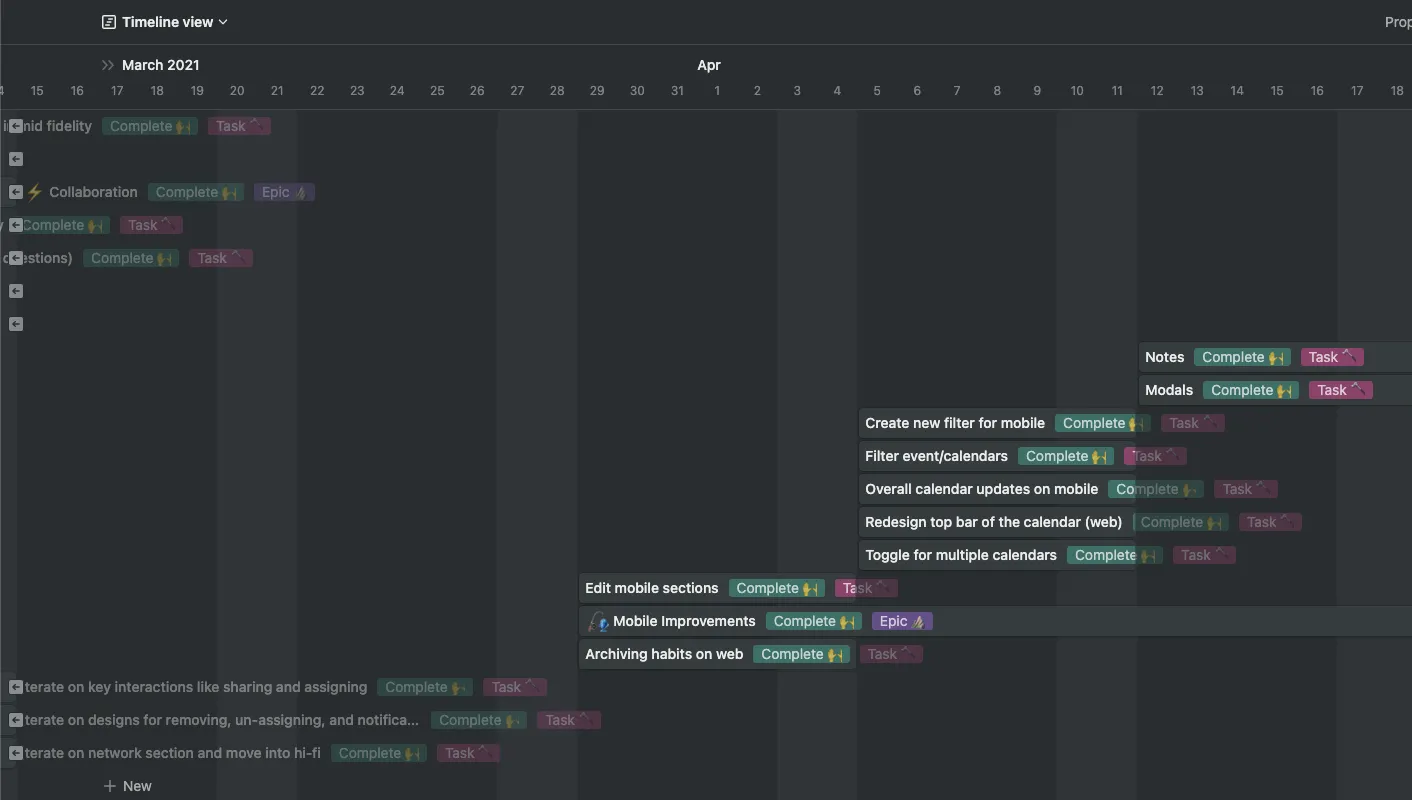
I always edit the template’s properties to suit my needs (delete a few, add a few) but most significantly, I keep the Timeline property.
By providing a start and end date to my tasks and epics, I can then view these items on Notion’s latest big feature, the Timeline view. You can toggle between views in the top left corner dropdown menu.
If you’ve ever used Gantt charts, the timeline view should look vaguely familiar; it lays out every epic and task multi-linearly, with no extra work needed. The color-coded properties help me visualize what sort of tasks I should be preparing for in each upcoming sprint, and I can open up each task as needed for more information.
Populate Your Design Sprints
Besides the Timeline view, my other favorite aspect of the Roadmap template is that it already has a relation property built in for tasks and epics (a relation is any property with a diagonal arrow icon).
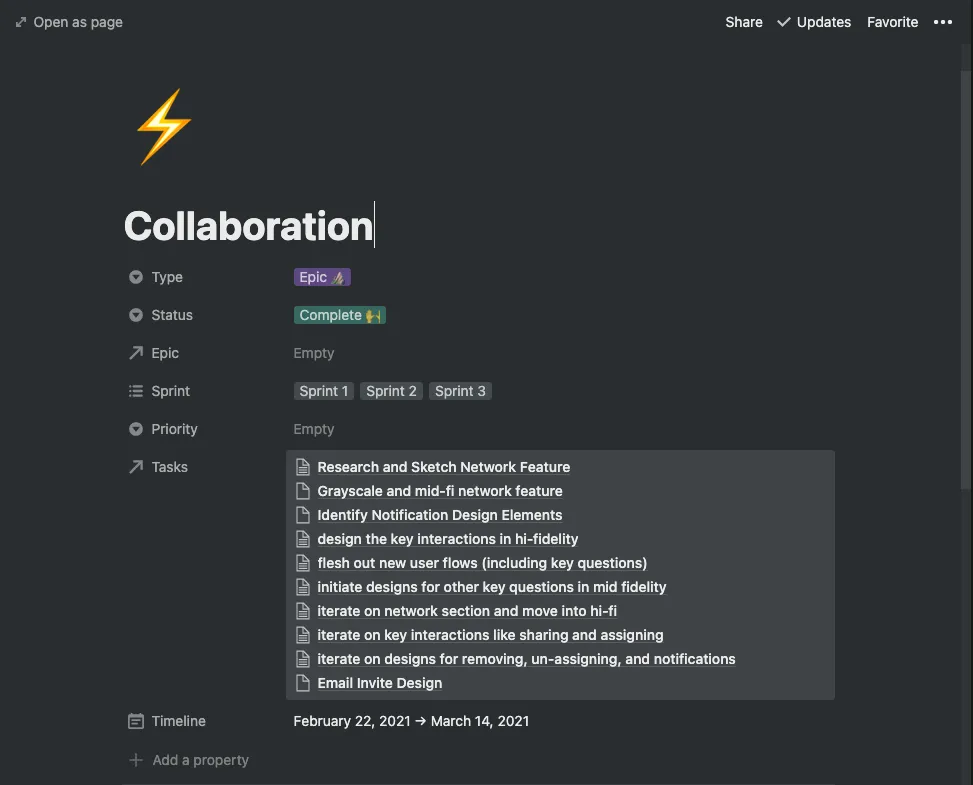
By relating a task to a certain epic, I can visualize epics (much larger chunks of design) at a higher level. For me, that level of organization is important for communicating my overall progress to partners and gauging the length of time it takes me to complete tasks.
For non-freelancers, gauging lengths of time during the sprint planning process is definitely important, but since freelancers usually get paid by the hour or by tasks completed, I find the relation tool quite helpful, just to keep all of my thoughts organized.
For more on relations (which are a newer and slightly more complicated Notion feature) checkout Notion’s own explanation of relations.
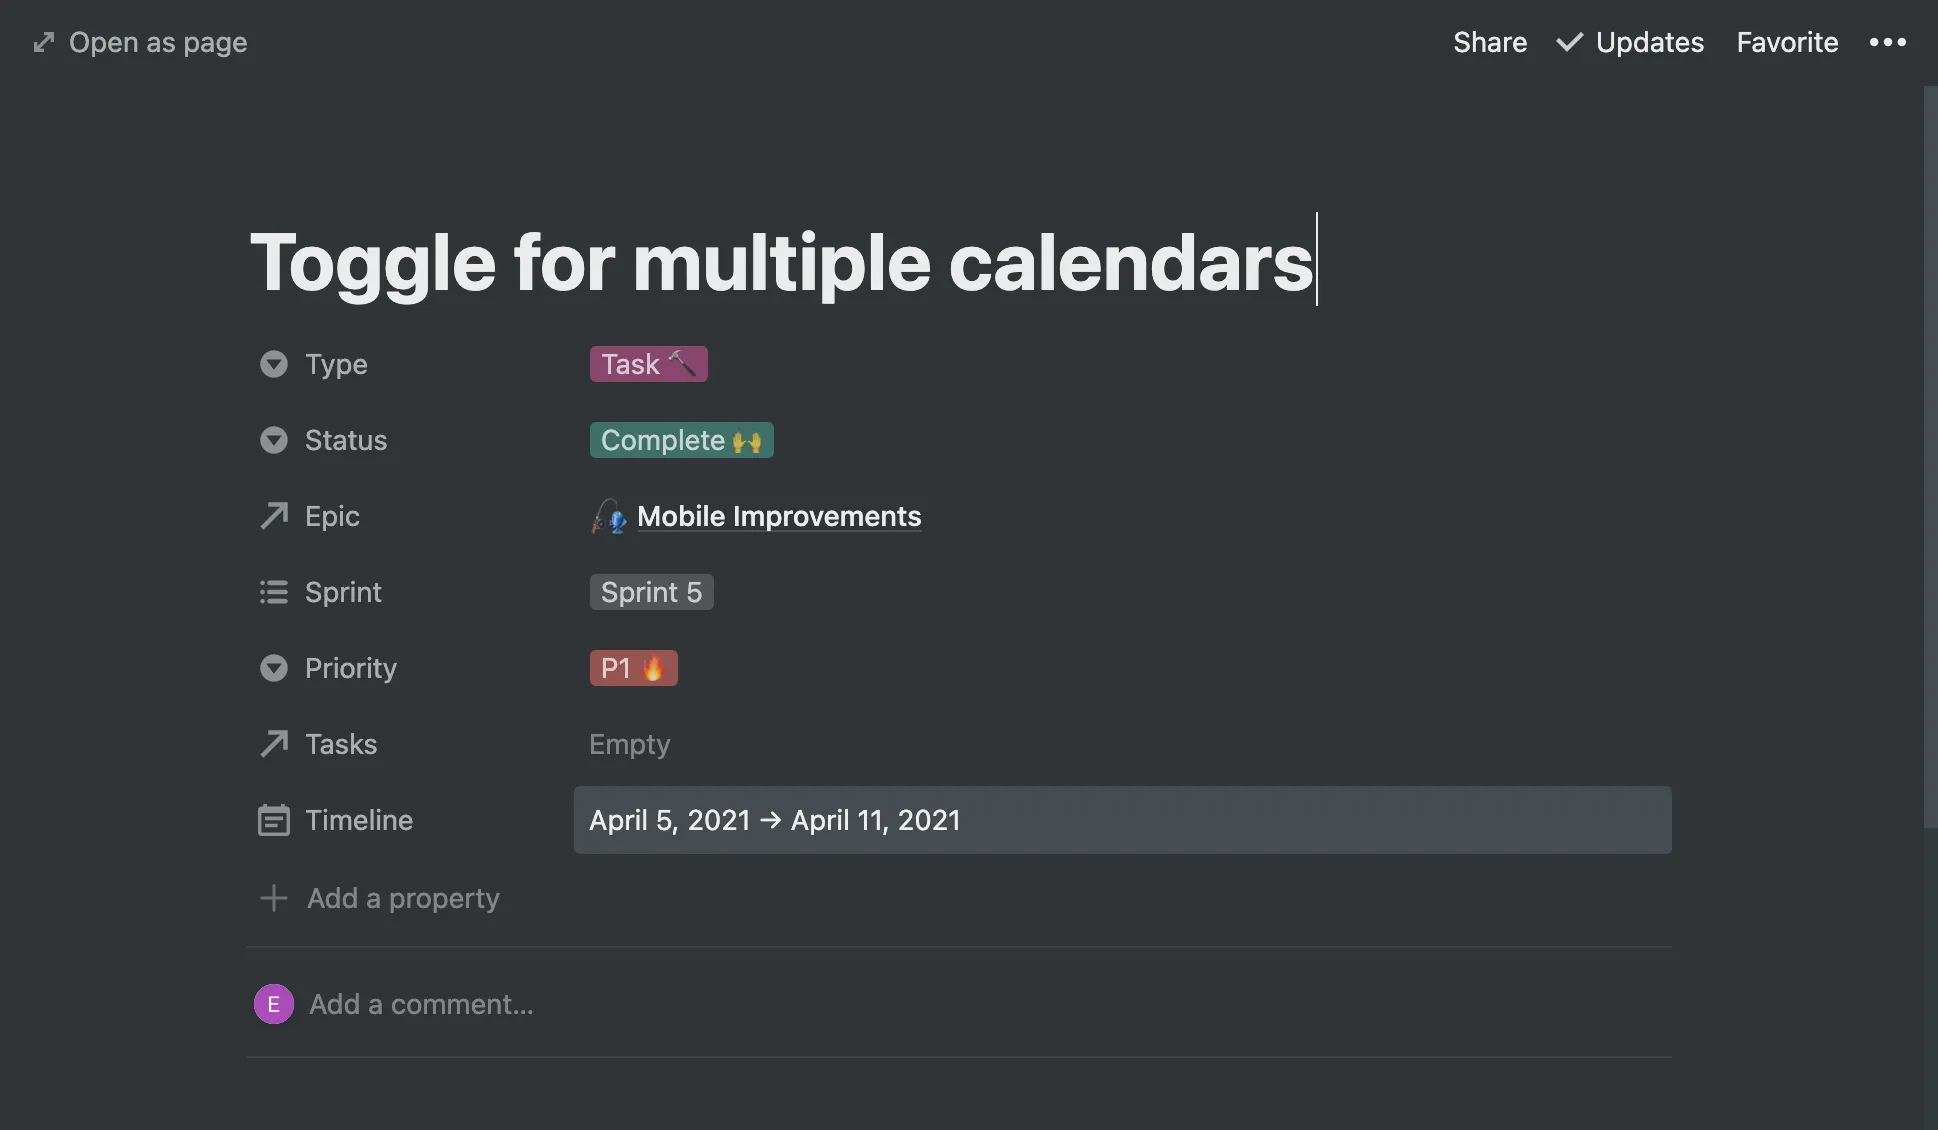
The Roadmap template comes with a page template (yes, a template-within-a-template) for creating Tasks, Epics and Bugs, which can definitely save you some time if you want to be that thorough with your sprint tasks.
Since I usually rely more heavily on general notes, I prefer to use my own Task template. This template just contains a few headers and places to store important links. For instance, I usually include a snippet from whatever design brief I’m working on, or relevant notes from meetings with clients and partners. You can even link to other databases or pages that already exist in Notion, like user personas or product discovery information.
The task or epic cards are also a great place to put Figma links or other documents. Notion has a great variety of embeds available for platforms like Miro and Framer. If you use this space frequently to write the same kind of data, I always recommend creating a template.
One thing the Roadmap template doesn’t include is a Deadline property—if you’re using Notion for the first time or are unfamiliar with Notion deadlines and reminders, I recommend adding a Deadline property to your tasks, just to see how it feels. I use Notion so constantly in my daily life that I normally don’t set reminders for myself within individual databases.
Go Forth and Freelance
In the last year, I’ve worked with four different clients using this Notion process and have found it incredibly rewarding, as both a long-time Notion user and as a designer/entrepreneur who also balances a full-time job. I have always been a big fan of Notion (and of task management in general) but Notion has been a game changer for streamlining the most arduous parts of the design sprint process.
As a freelancer, I’m tasked with creating and managing all of my own sprints, which isn’t always easy (as many project managers can probably attest). By taking ownership of my design process, I can approach clients more confidently with time estimates, completed tasks or epics, and other documentation.
Key Advantages of Using Notion
By doing all this setup work in Notion up front (creating templates, adjusting the database), you will ensure faster use for freelance projects in the future. You’ll only need to duplicate the page, template, or database when starting a new project.
Working in your own design sprints using Notion is also a great way to keep your freelance projects organized, and to practice the kind of cadence expected of designers at tech companies and design agencies.
In Notion it’s also easy to make a single page or pages client-facing, so you can share one aspect of your design process (or the whole thing) with your clients, other designers, or future employers.
Using Notion to house information is a great skill to mention to employers and list on your resume, as it’s very similar to CMS platforms like Trello, Asana, and Confluence (but much more powerful, in my opinion).
Summary
- If you’re a freelance designer or a Notion enthusiast, creating your own sprint database is a great way to challenge your skills.
- Let the platform work for you by taking advantage of templates, either the ones created by Notion or your own.
- Everything about Notion is customizable, so just because some of the above processes don't work for you doesn’t mean it isn’t worth trying for yourself; the really fun part of Notion is adapting its many customizable blocks into a powerful tool that works for you.
To learn more insider design tips on software and the design industry as a whole from expert mentors like Emma, we encourage you to explore our UX Academy program.


%20(1)-min.png)